Main Archive |

|

|
|
Main Archive |

|

|
The Main Archive menu is where you will spend the bulk of your time. There is an Introduction screen, as well as access to Folders and to your Objects. In addition, there are menu selections that give you access to the BarCode locator window, to an Image Viewer, to the Nomenclature Pick List, and to the PHM Thesaurus Pick List.

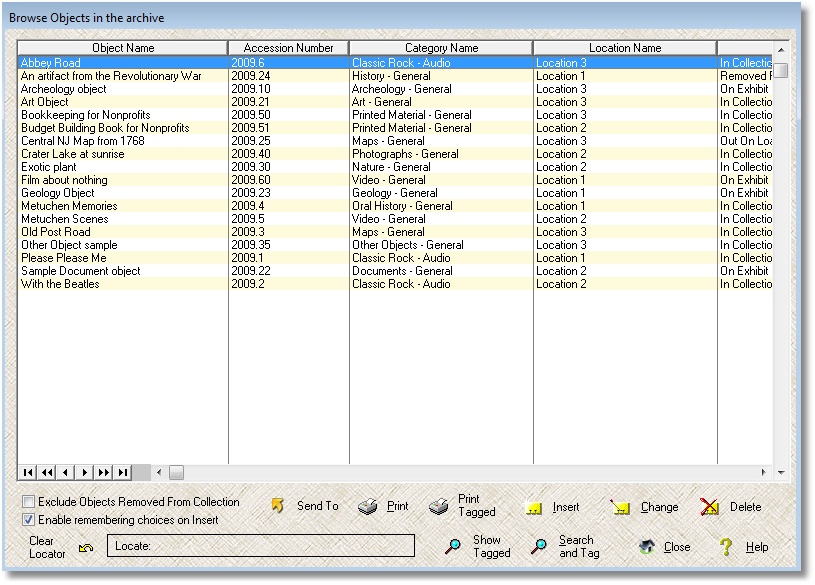
The Objects in the archive menu choice is where you'll browse the Objects that you've entered. As I mentioned earlier, all Objects end up in a single browse list box, and it looks like this:

The Main Archive browse window allows you to quickly locate and access your Object's details:

Get familiar with the capabilities of the browse list box. It lets you quickly find what you are looking for, and it gives you access to the underlying information for viewing, editing, and printing.
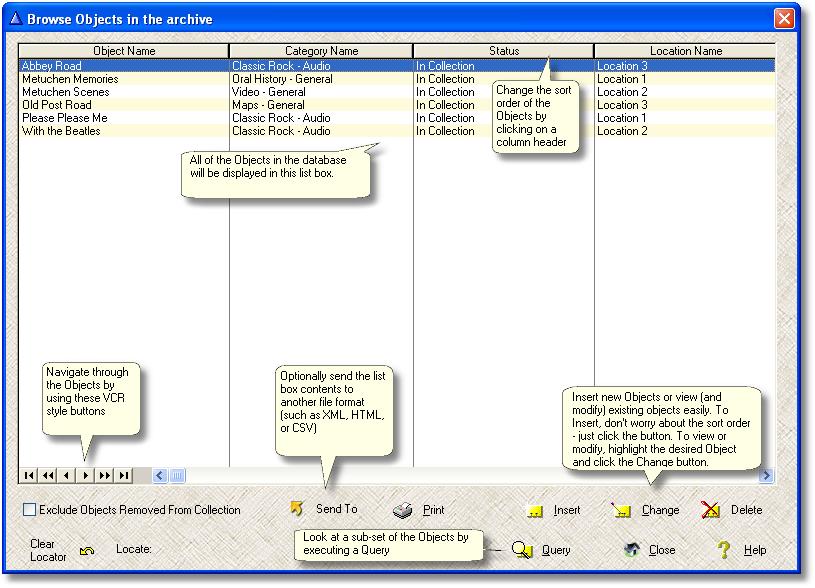
Column Headers - click on these headers to change the sort order of the Objects. One click will sort the Objects by that column in ascending order (displaying + next to the column header text), and a second click with sort the Objects by that column in descending order (displaying - next to the column header text). You can CTRL-click on multiple columns to create a multi-level sort.
VCR buttons - use these to jump around in the list of Objects.
Exclude Objects Removed From Collection - check this box to hide any Object with a status of Removed From Collection. This is a special status value that is built into the application. Rather than delete the Object completely, it is often preferable to simply designate it as removed. This lets you save the data related to the Object while noting that you no longer have the Object.
Enable remembering choices on insert - check this box if you want the software to automatically repeat certain required fields when inserting a new Object. This speeds up your data entry, and you still have the ability to modify the fields before saving the Object. The software remembers your choices for the current session only - if you exit the software, your choice selections are "forgotten". You can use the hot key combination of Ctrl-H to repeat the prior entry in any field, whether or not you check this box.
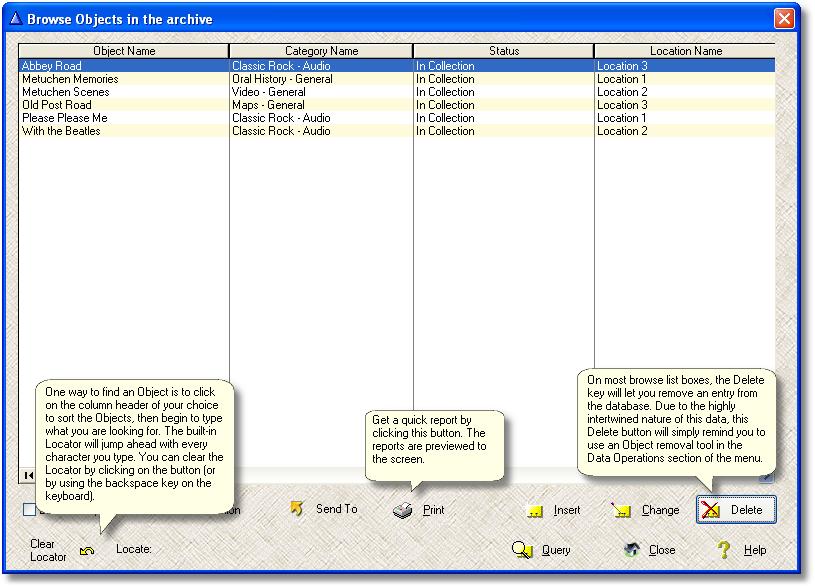
Clear Locator / Locate - when you type a fragment of the value you are looking for, your position in the list of Objects in the window will change with every keystroke. For example, if you are sorting on Object Name, and you begin to type Pleas, the Object with the name Please Please Me will be highlighted, no matter where you were in the list when you started typing. This is known as an incremental locator - the highlighted position changes with each letter typed. You can backspace to clear the Locator, or you can simply click on the Clear Locator button provided.
Send To (Premium edition only) - click this button to send the contents of the list box to a file. See the Send To page for more details.
Print - click this button to print a report on the currently highlighted Object.
Query - click this button to open up a query procedure. This lets you limit the Objects in the list box to those Objects that meet your specifications. See the Query page for more details.
Search and Tag, Show Tagged, Show All, Print Tagged (Premium edition only) - these are the Query By Example (QBE) buttons that give you the ability to view and optionally print out a sub-set of your data. See the Query page for more details.
Insert, Change, Delete - the action buttons on every browse window. You don't have to position yourself when inserting; the software takes care of that for you. To change (View or modify) an Object, first highlight it and then click the button.
